It's January, all the cold weather is keeping us cozied up, but there is a certain holiday sneaking up quickly! Valentines Day will be here before we know it, and we are getting in the spirit by creating DIY Valentines to make with our children for friends, families, and classmates. We will share a few handmade Valentines gift ideas with you in the coming weeks, and today we start it off with hand carved valentines cards made with our Carve-A-Stamp kit.

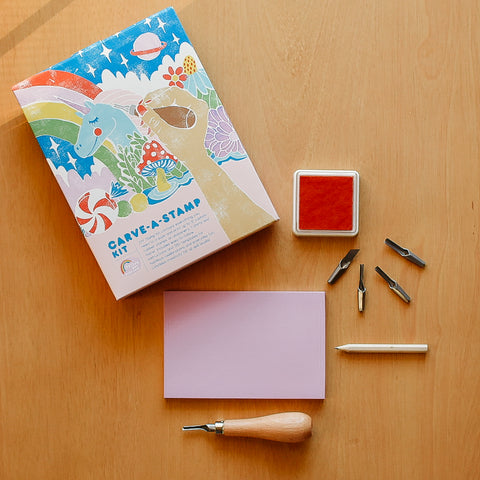
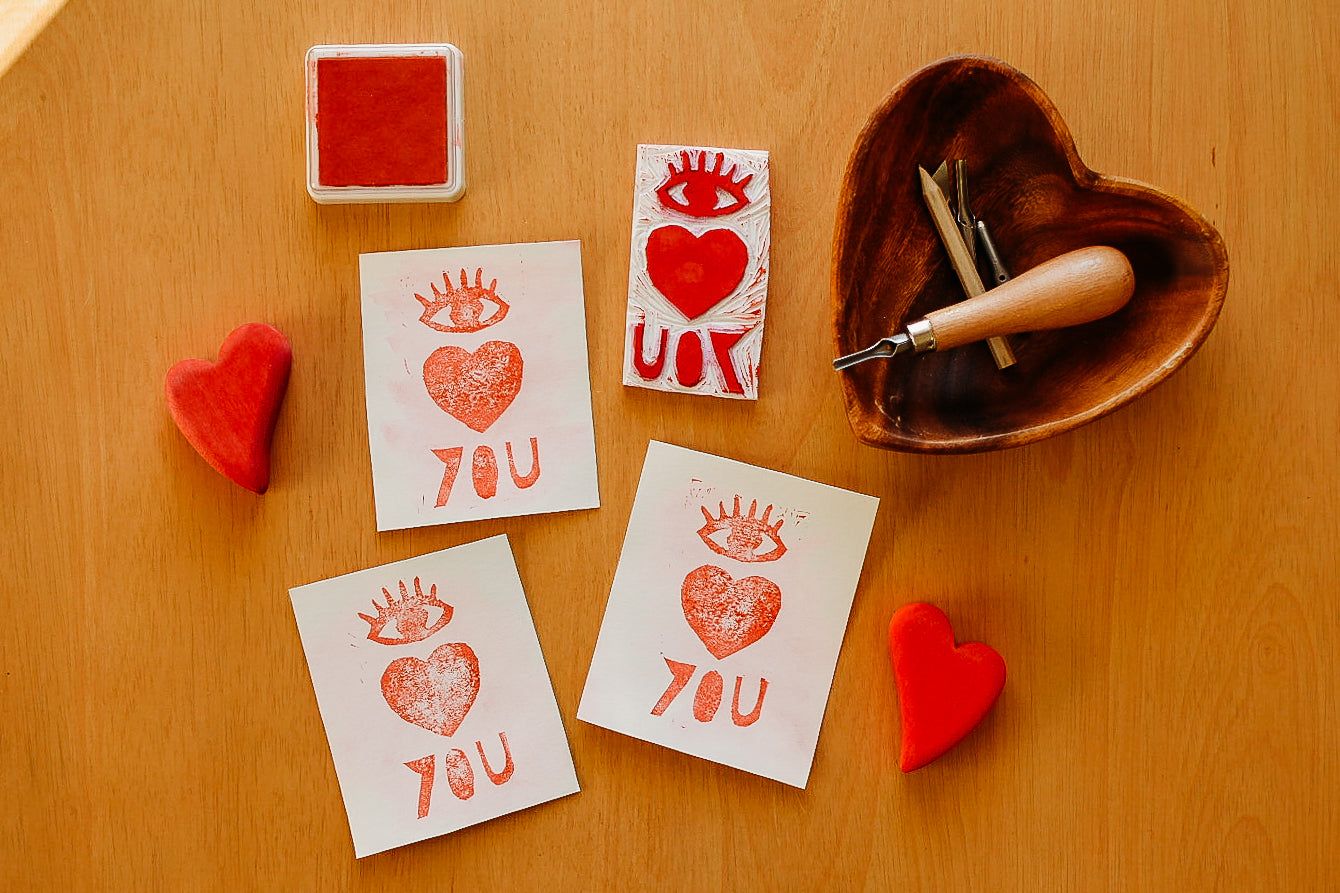
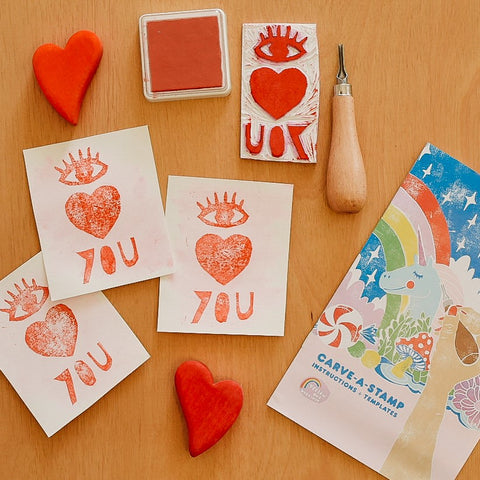
The Carve-A-Stamp Kit comes with everything you need to create your stamp designs including a rubber block with two sides for carving, a wooden carving tool with 5 different blades, red ink pad, a stamp template with 42 designs as well as two sets of alphabet stencils and two sets of number stencils. You can use the included template or design your very own stamp. The red ink pad is perfect for Valentines Day, but you can also use paint in any color for stamping!
Gather Your Supplies:
-
Carve-A-Stamp Kit or rubber block and carving tool
- Cardstock - enough sheets for the amount of cards you'd like to make
- Ink or paint in color of choice (red ink pad included in Stamp Kit)
Carve Your Stamp:
1. First, decide the style of stamp you would like to create. You can draw your design directly on the rubber block with pencil, or if you would like to use the included stencils, simply trace the stencil on the included transfer paper. Once you've traced your design, place the transfer paper onto the rubber block and use the back end of the carving tool to push on the pencil lines to transfer them onto the rubber.
**Important Note: Don't forget that any wording or lettering needs to be placed backward to be legible on the stamp!

2. Once your design is complete, it is time to carve! Start with the smallest carving tool (labeled number 1) to etch off all the pencil mark outlines. You may want to practice carving a little bit before you begin with your actual stamp design, to get a feel for how the rubber carves.
3. When you've gotten all the smaller details carved out, use one of the bigger carving tools (labeled numbers 2-4) to carve away the bigger areas around the traced design. Anything that is carved away will not stamp, and the rubber design that is left will.
Create Your Card:
4. Your stamp is complete and now it's time to design your card. We chose to use thick watercolor paper and
Stockmar Watercolor paints to add a little extra touch to our stamps. You could paint, draw, or make another stamp with a design to go around your already made stamp! Or keep it simple, and just use the stamp. The possibilities are endless!
5. All that is left now is to cut out each individual card and stamp your design onto them! Add any personal touches like signatures or messages and you are all ready to warm hearts with these special, hand made cards!
The
Carve-A-Stamp kit is fantastic for learning how to carve rubber stamps. It includes everything you need to make your own stamps and concise directions that are easy to follow. You could make stamps to use as Valentine's Day cards, or other holiday cards, to make gift tags, stamp wrapping paper, recipe cards, or even stamp fabric!
Children love to create gifts for people they love with their own hands. Taking our time to handmake things with them shows them that our time is a valuable gift we enjoy spending on the people we care about. We will share more ideas in the coming weeks, and would love to hear from you about what you create for Valentine's Day! Tag us on Instagram @bellalunatoys and don't forget to use the hashtag #bellalunatoys when you share!


Leave a comment