


Wool playmats are a beautiful and open-ended way to engage a child’s imagination. Wet felting may sound complicated, but it is truly a very forgiving craft. Follow these simple steps to turn a pile of wool roving into a handmade treasure. Let’s dive in!

Gather Your Wet Felting Materials
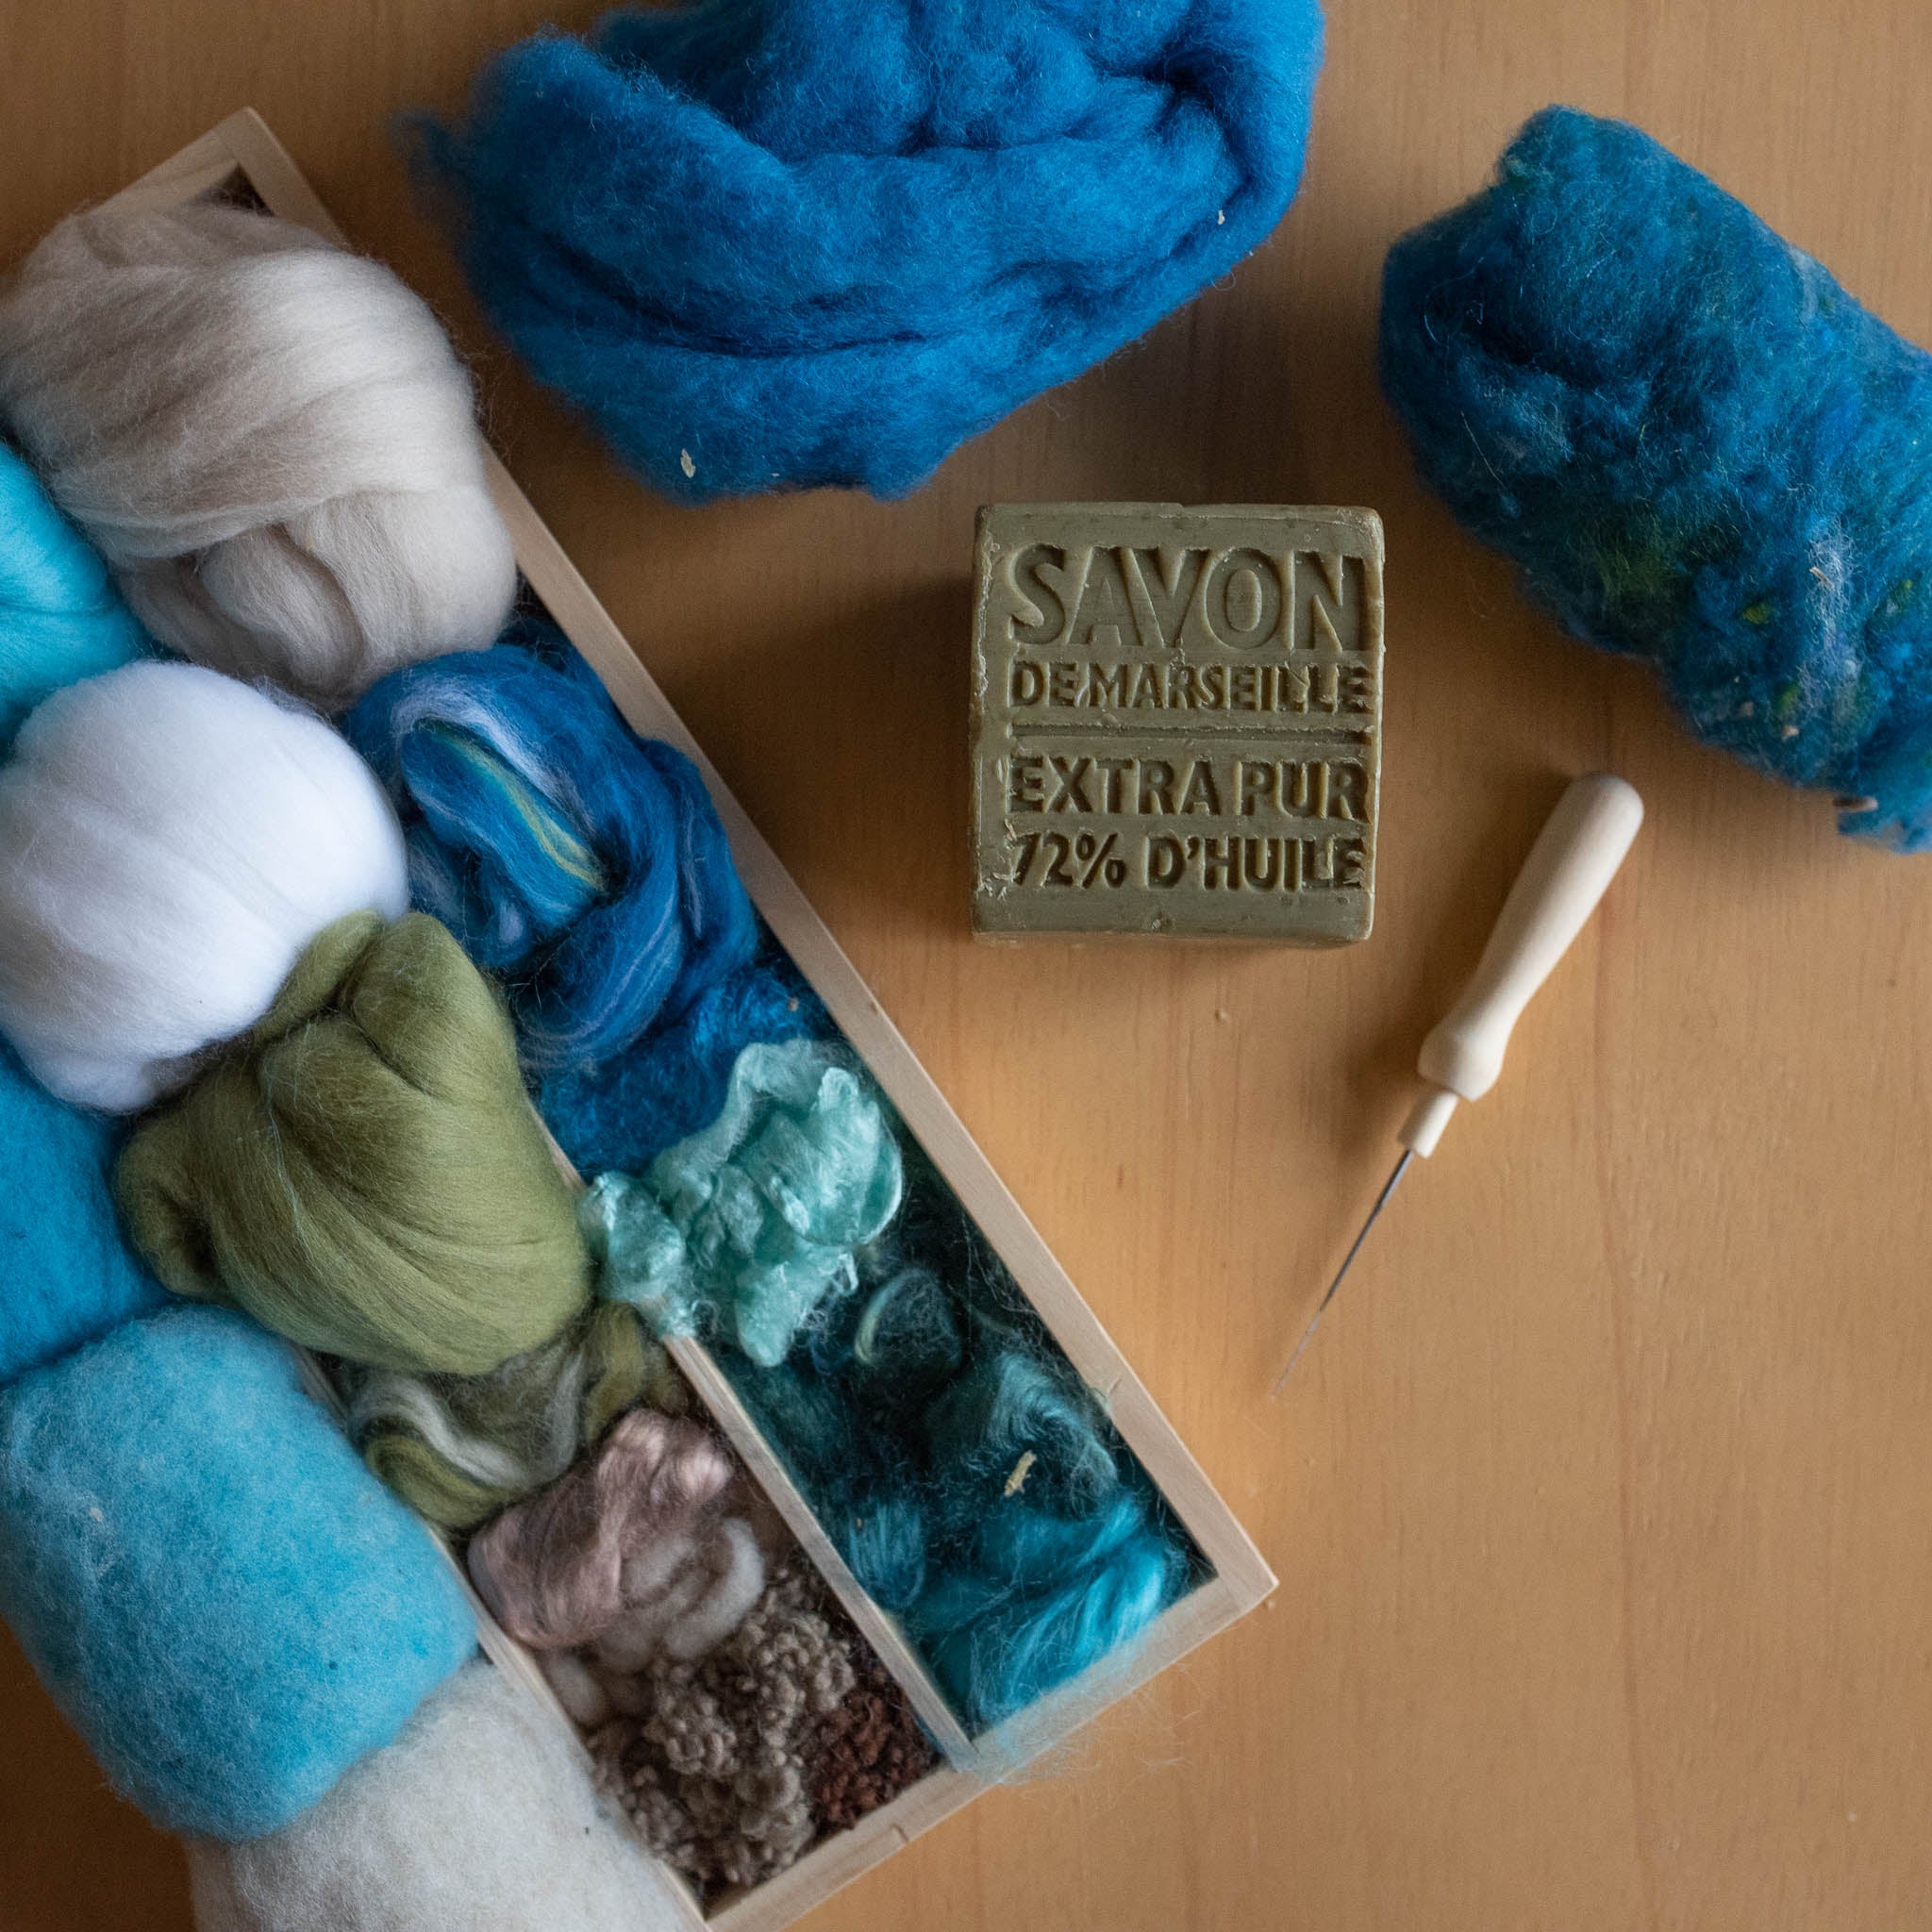
- An assortment of colored wool roving
- A few chunks of core wool (optional)
- A gentle soap like an olive oil bar or dish soap
- Bubble wrap
- A towel
- String or rubber bands
- Hot water
- Needle felting foam and needles (optional)

Layer the Wool Roving
Begin by laying small pieces of wool in a flat layer, laying in the same direction and overlapping each other. Create the general shape of the playmat during this stage.
Each additional layer of wool roving should be going in the opposite direction of the previous one. You’ll need at least 6-8 layers. The more layers you add, the sturdier your playmat will be.
For the last two layers use the colored wool you’ve selected to create the design you want. We are creating an ocean so we chose blues and browns to create the general shapes we wanted.

Just Add Water!
Fold the bubble wrap over your mat and use your hands to rub back and forth in all directions, agitating the wool and helping the fibers interlock.

Check on your design and reshape the playmat as necessary. During this phase you can still add wool to fill in spots that are sparse and add more details. We added some specialty wool to create a rock texture and some highlights for waves.
Continue to cover your project with the bubble wrap and rub for at least 10 minutes, or until the wool is fully combined. You can use your hands or a roller tool for this.
Transfer the playmat, inside of the bubble wrap, onto a towel. Roll it up tightly and secure with rubber bands. Press and roll the towel back and forth for 15 minutes, or toss it into the dryer to thump around for half an hour.
Add the Finishing Touches
Lay the wet felted playmat flat to dry. If you’re happy with your results you can stop here. Otherwise, grab your needle felting tools and add your desired details. We put in a few pieces of tan and green merino for more sand and sea grass, as well as some more highlights and waves in the ocean.


Leave a comment