


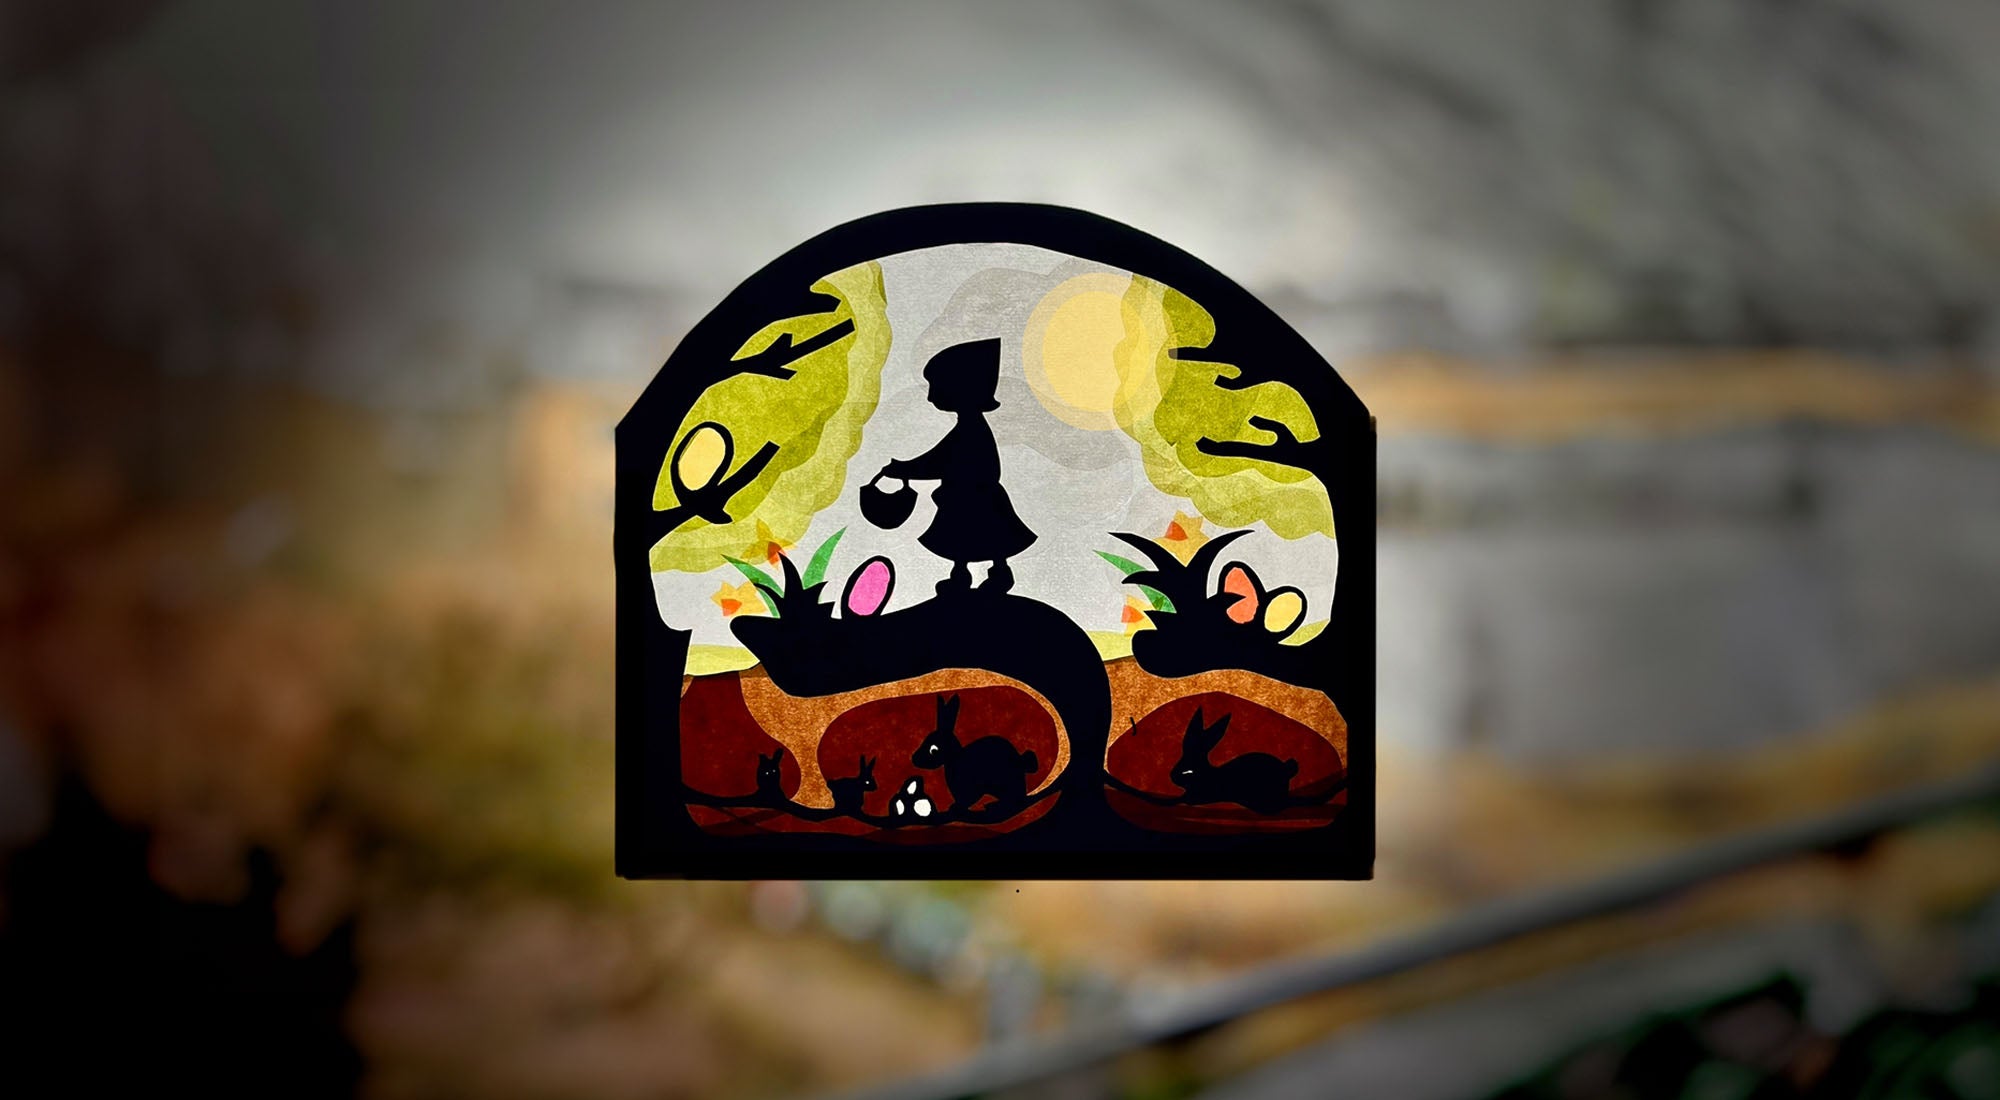
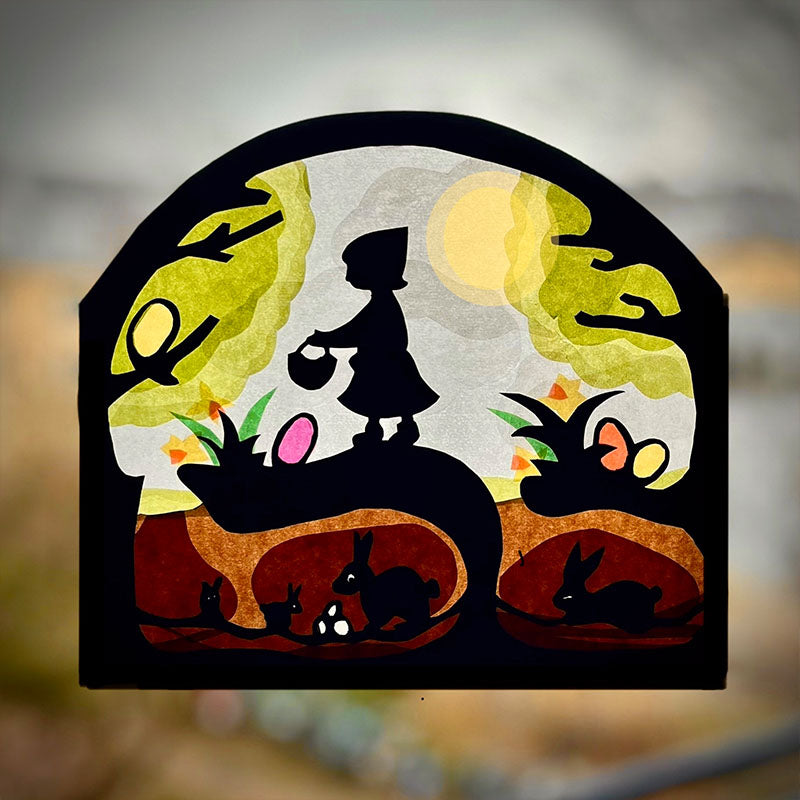
We are creating a stunning window craft as bright and beautiful as the blooming spring outdoors. Join us in celebrating the arrival of spring as we infuse our space with the spirit of the season and welcome the freshness of nature indoors.
Our friend Franziska Shelton created this stunning window transparency that we are so excited to share with you.
What's with Waldorf and Window Art?
If you have ever visited a Waldorf school or been to a Waldorf inspired home, you have probably seen colorful window stars or specially crafted transparencies displayed in the windows. But why? Waldorf inspired education focuses on engaging the head, heart, and hands of each child and allows them to express themselves through hands-on learning. Learning origami and cutting out window silhouettes is a fantastic way to learn fine motor skills and to bring seasonal art to life. Window art also presents a wonderful way to bring the seasons inside the home and school. As the light shines through the colorful kite paper, we are reminded of the force of light that is breaking through the windows and warming our hearts.
Gather Your Supplies
- Waldorf Window Star Paper
- Scissors
- Craft knife
- School glue
- Printed template
What Materials Should I Use?
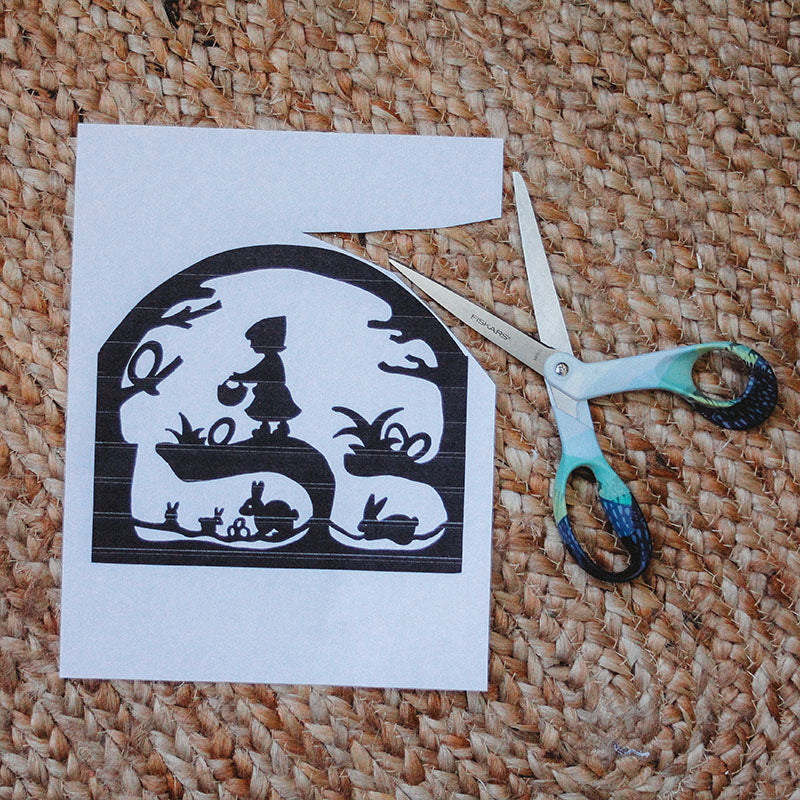
I get this question all the time and I finally have a typed-up response for you! You will begin by printing the featured transparency templates on regular printer paper or cardstock. Once printed, you can use special silhouette scissors or a fine crafting knife (Exacto knife) on a self-healing mat to cut out the templates. You can also use a pair of straight nail scissors with sharp blades for silhouette cutting. This step should always be completed by an adult as working with sharp tools is dangerous for children. Once cut out, you can use kite paper or transparency paper to line your template. Kite paper usually comes as 6.5 x 6.5” squares and transparency paper usually comes as 8.5 x 11” rectangles. Both work equally well. Use a pencil to cut out appropriately sized pieces and use a glue stick to adhere the kite paper to the backside of the template(s). The more layers of kite paper you add, the more of a 3D effect your transparency will showcase. Display your transparencies in a well-lit window and use a bit of double-sided tape to attach them to the glass.
Cut, Trim & Paste
The beauty of window transparencies is that they can be as simple or intricate as you want to make them. Have fun designing the inside of your template for endless creativity. Start by using scissors and a craft knife to cut out your frame and the white spaces on the inside. Next, you will want to plan out the colors and the design that you plan to use. Use small dots of school glue to attach the pieces of kite paper to your frame.
Once you've glued all your pieces to your frame, allow them to dry for 30 minutes to an hour before carefully taping them on your favorite window. Create multiple transparencies with bright colors and add some kite paper flowers for a lovely spring window display!

Leave a comment